
Warlord Titan – Painting the Legs Part I
I covered the primed lower torso with Citadel Lead Belcher spray.

Then, I liberally applied buckets of Nuln Oil to the lower torso. It was messy… nuln oil was spattering all across my cutting mat, and citadel washes have a certain less than pleasant smell. It’s winter here and there are no flies, but somehow, somewhere, father Nurgle hatched a housefly just for me and I witnessed a fly buzzing around the drying nuln oil. I wonder what that stuff is made of…


Once the nuln oil dried (overnight, with the flies) I laid down a very light coat of waywatcher green glaze. The trick here is to not let it pool up, where it’ll look bright green. We’re just going for a slight tint to add some depth to the metal. If you really want to go crazy, you can actually add multiple tints (maybe a magenta) and make the metal even more complex.


After the glaze dries (pretty fast, a few minutes) it’s time to dry brush about half a pot of necron compound.


And that’s the basic metallic finish I’m using for the titan legs. 5 coats. Primer + Lead Belcher Spray + Nuln Oil + Waywatcher Green + Necron Compound dry brush. I sixth coat of the magenta glaze/tint would add more awesomeness.
Below I’m applying the same steps to the main leg pistons, plus the beginnings of the warning stripes.
I used the citadel Led Belcher Air to hit the back of the leg pistons (after masking the fronts)


Then I threw down the Nuln Oil

Masked Even More (PITA)

Then, I sprayed Creatix wicked Golden Yellow. For some reason of physics I don’t understand, yellows are always a complete pain the butt. It took about 30 coats to get the color saturation required without pooling/orange peeling the pigments.

And here is is a picture of my ArtoGraph 1520 Spray Booth but with the metal hood, which I don’t see on the artograph website any more.
So…much…painting…left. YAY! :)
Share this:

Priming the Warlord Titan
I started 207 days ago (6 months, 23 days) and just this weekend got to ‘construction complete’ ! My very demanding career, even more demanding toddler, and a new home purchase & family move significantly slowed down my play time.
Anyhow, time to start the slow process of painting.
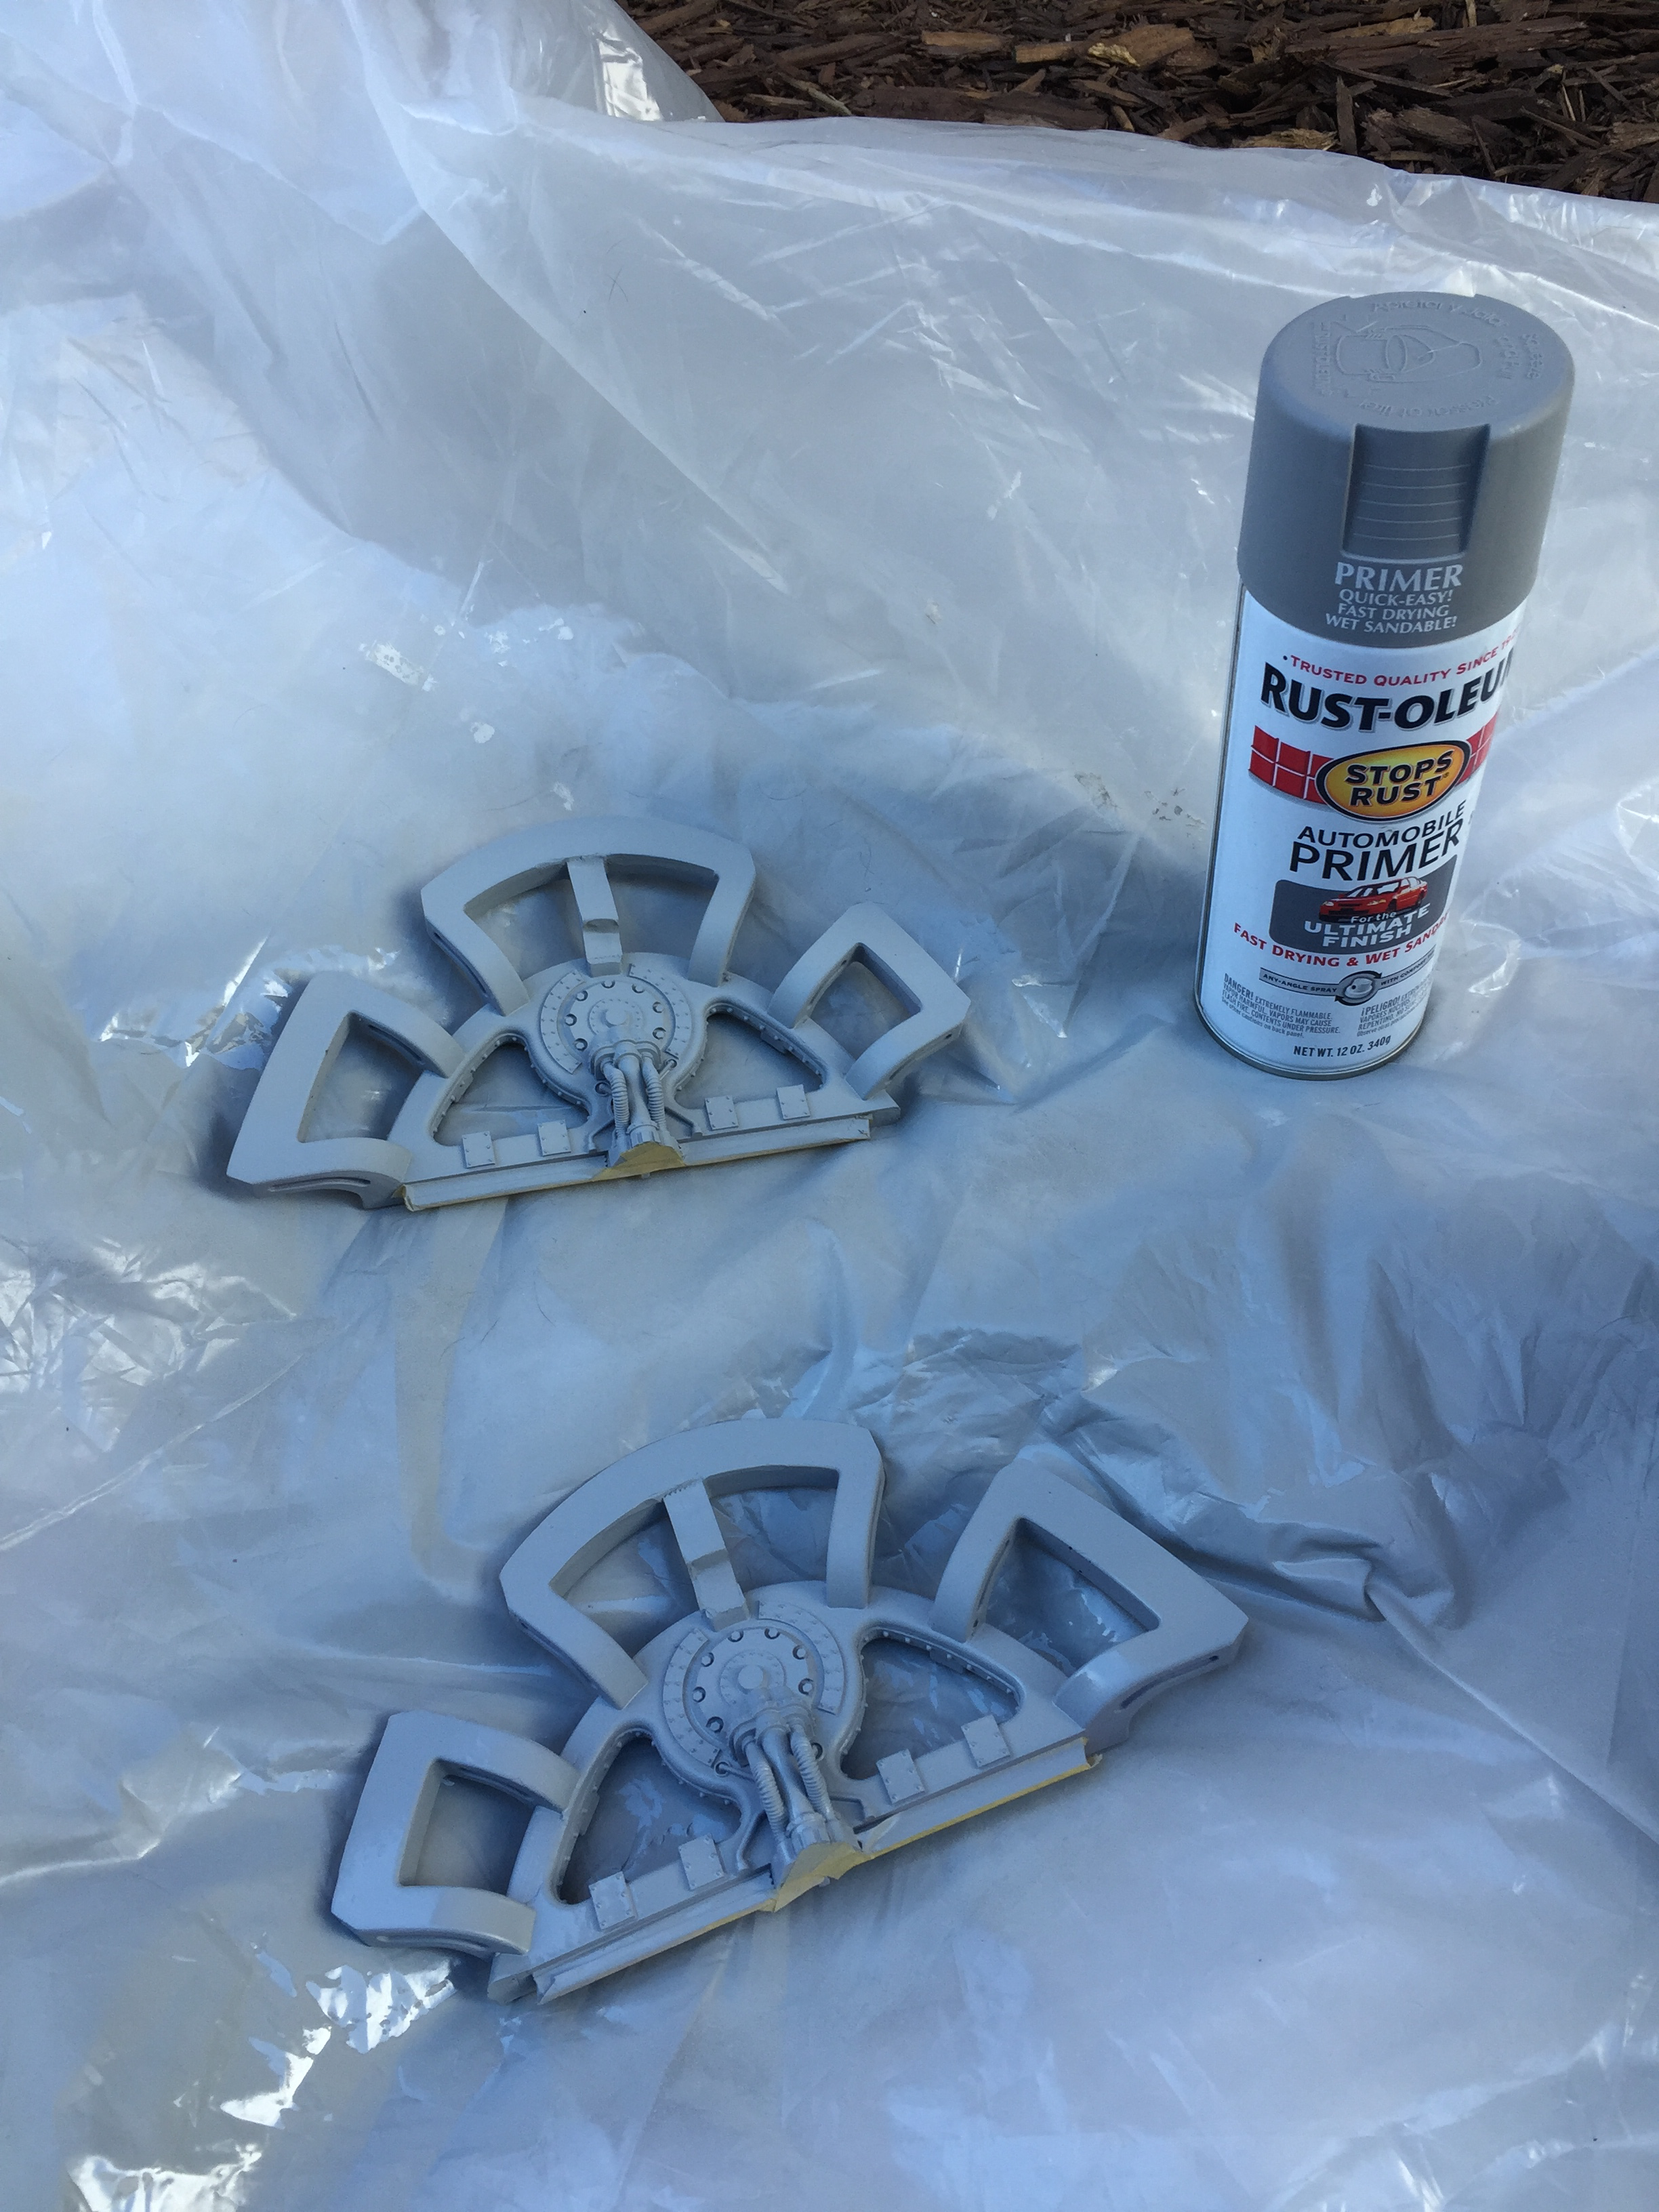
This weekend it was all about priming. I use Rust-Oleum Gray Sandable Primer for a few reasons.
- Gray: I like gray over black so I can create ‘highlights’ on the panels. I lay down a lighter gray base primer over the entire model, then add shadows with black primer around the edges of the armor panels. When laying down airbrush colors, which are almost all transparent to some degree (think ‘tint’ instead of ‘cover’), the color over the gray is brighter than the black, creating depth and making the model look less flat.
- Sandable: I sprayed at a temperature in the mid 80’s (crazy for February, welcome to San Diego, CA!). This is slightly warm for spray cans, which mean that some of the paint dries slightly before it adheres. This can leave a slightly rough surface texture. Because it’s a sandable primer, I can (and will) use steel wool to smooth down the primer coat and get a nice clean finish once I start using the airbrush.
- Spray Can: Usually I HATE spray cans, as they produce splotchy light/heavy coats, are difficult to control, waste a bunch of paint with overspray, smell horrible, and are super dangerous (read the MSDS!). However, what they excel at is adhesion. All those solvents (Acetone, Xylene, Mineral Spirits, Propane, Butane) really make that paint STICK! This is super critical when painting over resin. There is nothing more tragic (relatively speaking of course) then spending 100+ hours painting a Titan only to have the paint flake off when removing a mask on a critical part of the model. It’s happened to me, it sucked, wash your resin and lay down a good primer coat!
You can see masking done in the image gallery below. While masking the glue joint areas is time consuming, if you don’t do it, you either end up gluing paint film to paint film (which is a super weak bond) or you have to spend hours and hours scraping paint off the joint surfaces. This way, once painting is done it’s a simple matter of removing the mask, scoring the raw resin with an x-acto knife, and using Cyanoacrylate (CA) or JBWeld to get a strong joint.
Because it’s a spray can, there’s a huge amount of overspray, thus the giant piece of cardboard and the improvised spray station in the back yard.
Since I have a toddler, and spray paint has nasty solvents, I let the paint cure overnight in the garage before bringing back into my workshop. Even then my workshop smelled like a chemical factory for a few days (again, I usually avoid spray cans like the plague!).


Once the primer has dried for a good long period (I waited a day) I use steel wool to smooth over the finish. It creates a smoother finish, but creates a giant mess of steel wool lint all over the model. Fortunately, steel wool is magnetic and can be easily cleaned using magnets!

In this video you can see me pull off the steel wool lint. There is some lint stuck near the ‘eyes’ of the Titan because there’s another magnet up there, so I had to remove that with a q-tip.
Share this:

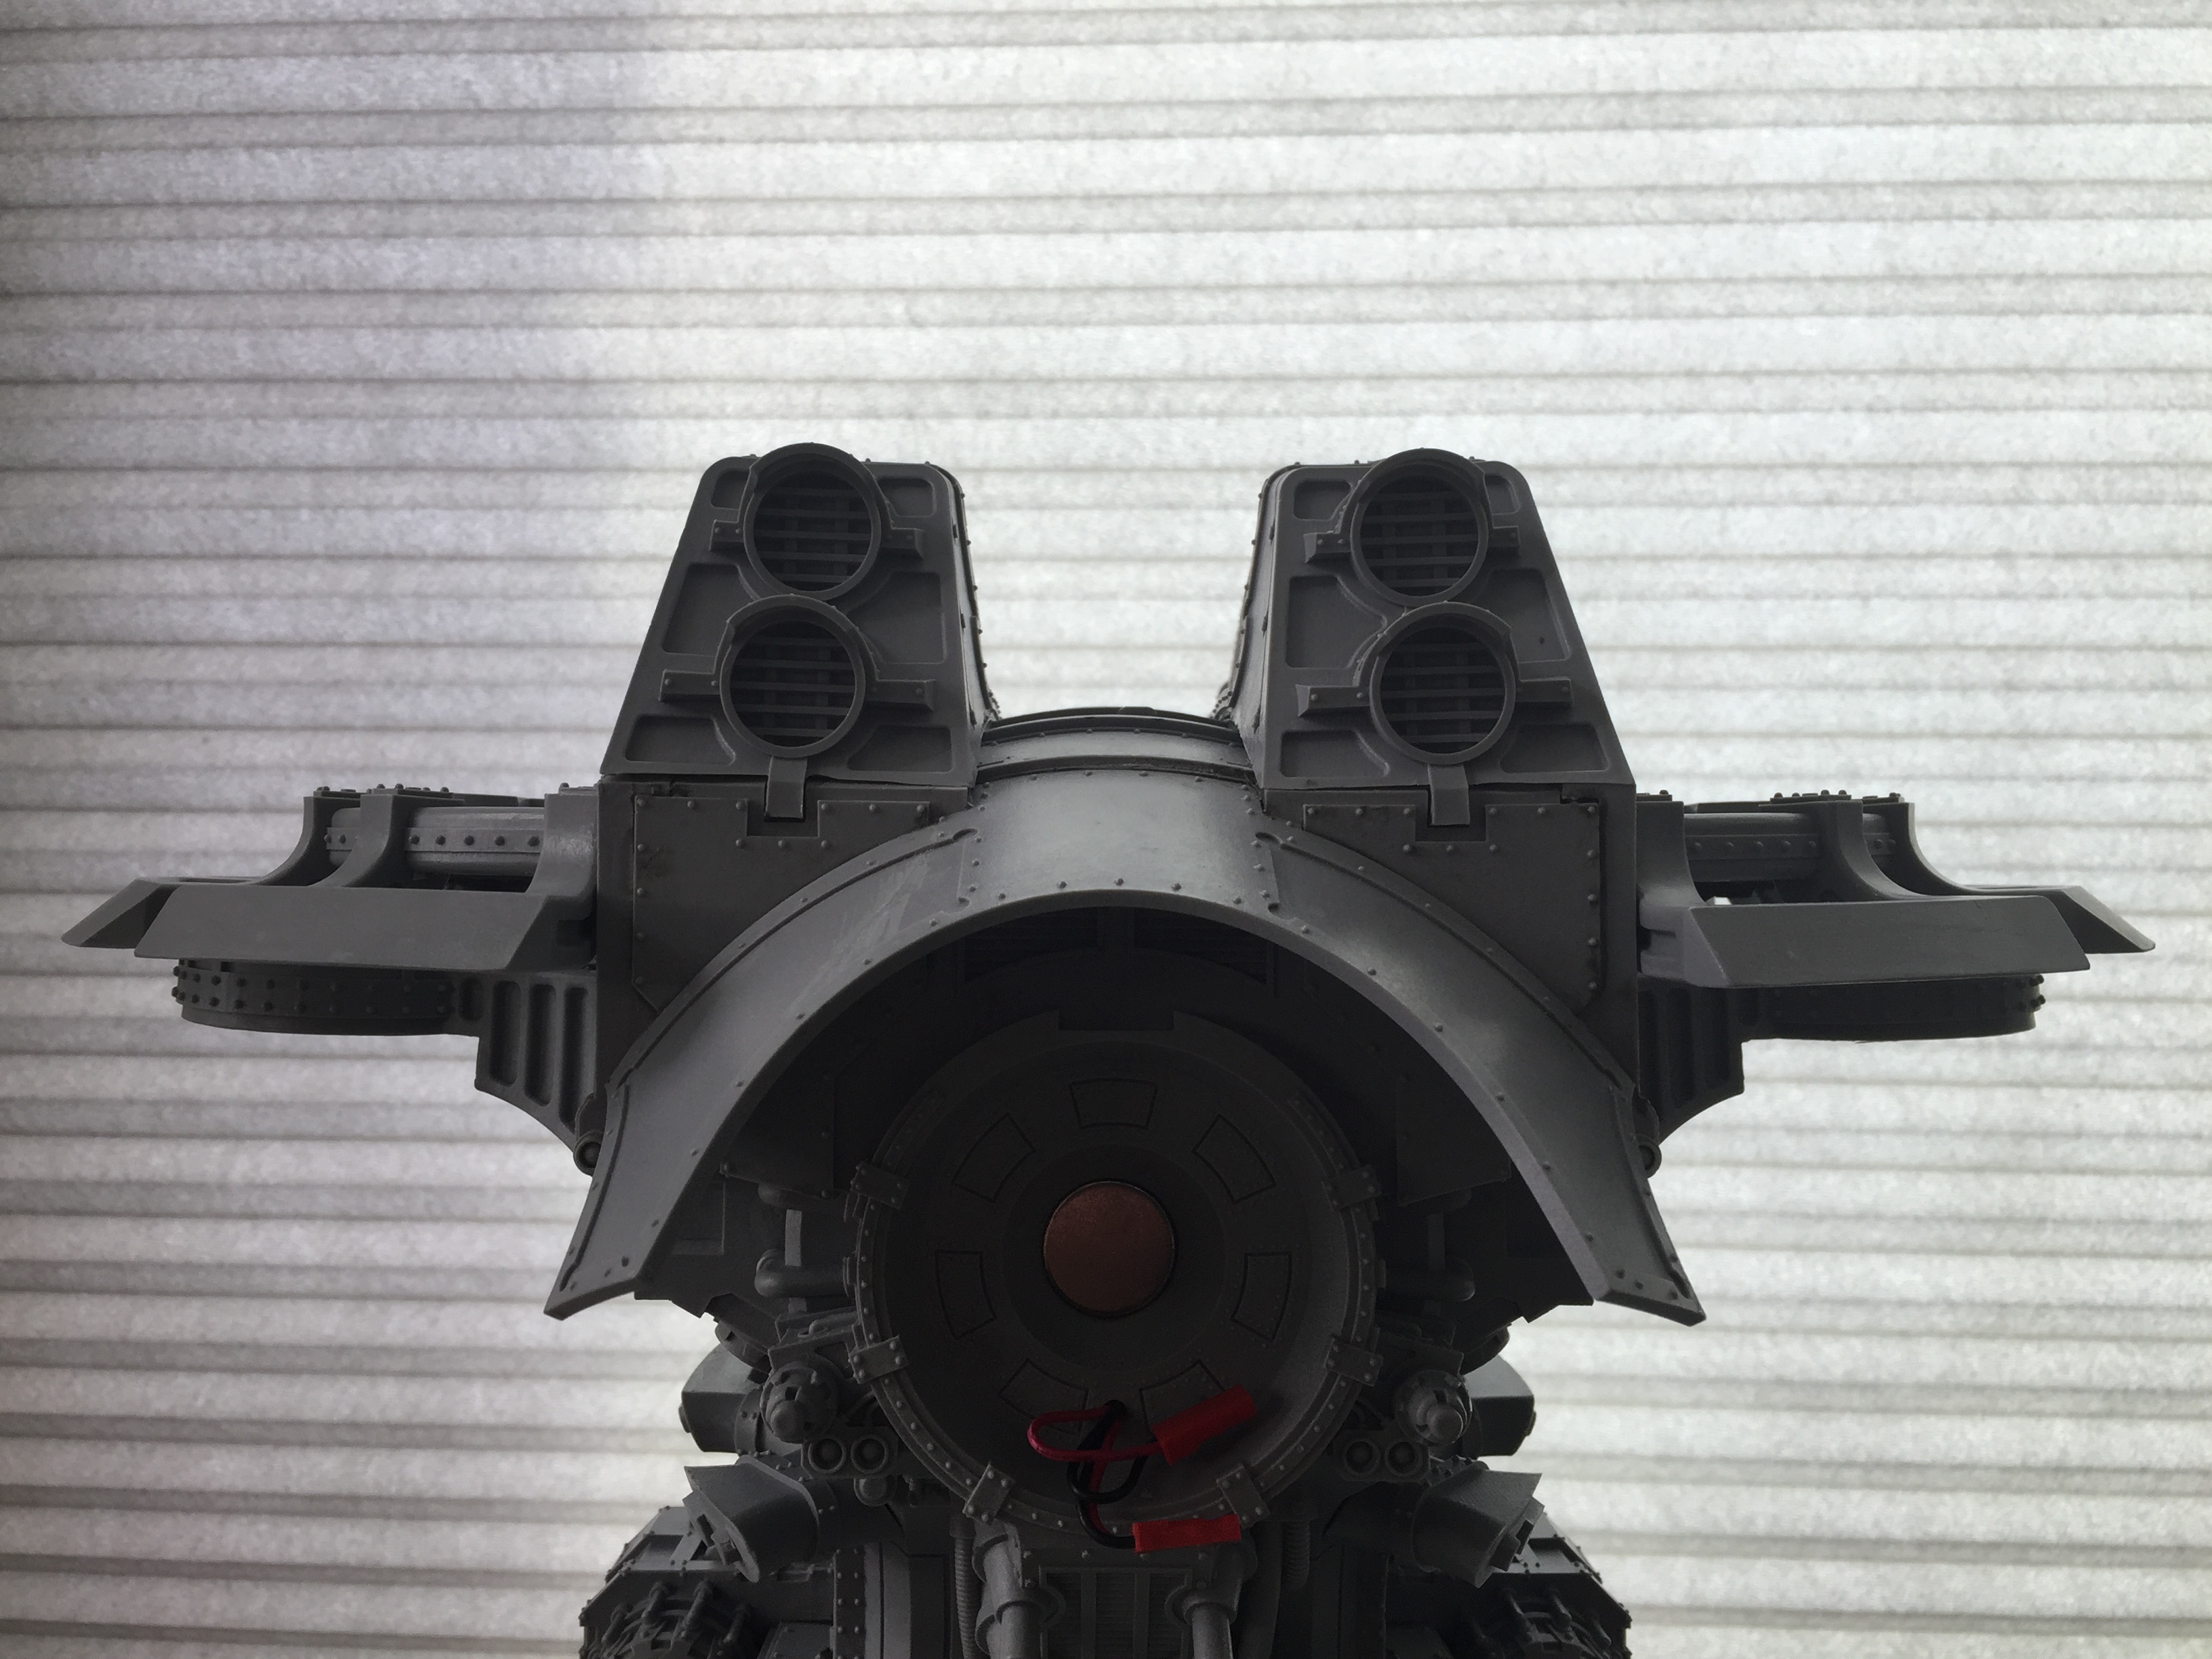
Warlord Titan Arm Magnetization
I started off by gluing in 3/4″ metal washers to the upper shoulder mounts and the big 3/4″ magnets (DC6 magnets from K&J with a 24 pound pull force magnet to magnet) in the arms themselves. The heavy volcano cannon arms did stick, and the ‘straight down’ pull force was nice and heavy, but it was a bit too easy to ‘twist off / pull to the side’ the cannon and remove it. I was envisioning carrying the titan through a store, bumping something, and the arm falling off… so I changed strategies (see below).

Here’s the 3/4″ magnet in the lower arm assembly.

A #8 bolt/nut, cut to length, with holes drilled in the elbow/cannon.

Here’s the bolt installed. This works generally and makes the gun detachable, but right now it’s sort of ‘swings loose’ at the elbow joint, so I can’t statically position the gun at a certain angle. Without the armor plates installed, it seems to swing out basically level. This means that the elbow is at the balance point of the gun, the back or front isn’t significantly heavier than the other, and this may change once the armor plates are installed.

After being worried about the pull strength of the magnet + washer, I drilled in from the top of the shoulder and installed another 3/4″ magnet in the top. Now the pull force is nice and heavy… very little chance the arm will just ‘fall off’ when bumped, and it requires very deliberate pull force to remove.

The downside to a magnet in the upper shoulder (instead of just the washer) is that I had to spend a lot of time notching out the upper shoulder plates so they would fit ‘flat’ over the magnet. This is why I tried the metal washer approach to begin with, but after 30 minutes of filing was able to get the shoulder plates to lay flat, and the magnet is covered up nicely when everything is installed so I’m okay with the looks of the ‘magnet on top’ approach.
I tried popping out the washer…but JBWeld is strong stuff and it wasn’t going to pop out, sut I have an extra 1/8″ of height on the upper shoulder magnet that I wouldn’t need had I just gone with the magnet only in the upper shoulder.
Below, you can see the upper should plate masked off before I painted. The middle support ‘bar’ with the masking tape on it clearly shows the notch I had to put in for the plate to sit flat. I also had to file down a few other locations on the shoulder plate to get it to sit flat, but the notch where the masking tape shows up is the biggest modification required.

Because it’ll be very difficult to paint between the upper shoulder and the shoulder late, I went ahead and primed/painted both before gluing everything in. I use rust-oleum gray sand-able primer (found at an auto parts store) for the primer, and I tried games workshop new airbrush paint (leadbelcher). I don’t use much Games Workshop paint, but still love their metallics.
I didn’t prime the entire upper torso (yet), just the sides near the shoulder assemblies.

Here is the shoulder, painted up with Games Workshop Leadbelcher Air

And a picture with the volcano cannon attached (magnetically)

The shoulder plates after lots of notching/filing so they sit ‘flat’ on the shoulders.
Hole drilled ready for the 1/2″ magnets (SD84-IN from K&J with a 9.9 pound pull force magnet to magnet) for the shoulder mount

The shoulder mount with a 1/2″ magnet installed / glued in place.

And that’s the overview of the way I approached the arms/shoulders/magnets/bolts on the warlord titan.
