
Warlord Titan Arm Magnetization
I started off by gluing in 3/4″ metal washers to the upper shoulder mounts and the big 3/4″ magnets (DC6 magnets from K&J with a 24 pound pull force magnet to magnet) in the arms themselves. The heavy volcano cannon arms did stick, and the ‘straight down’ pull force was nice and heavy, but it was a bit too easy to ‘twist off / pull to the side’ the cannon and remove it. I was envisioning carrying the titan through a store, bumping something, and the arm falling off… so I changed strategies (see below).

Here’s the 3/4″ magnet in the lower arm assembly.

A #8 bolt/nut, cut to length, with holes drilled in the elbow/cannon.

Here’s the bolt installed. This works generally and makes the gun detachable, but right now it’s sort of ‘swings loose’ at the elbow joint, so I can’t statically position the gun at a certain angle. Without the armor plates installed, it seems to swing out basically level. This means that the elbow is at the balance point of the gun, the back or front isn’t significantly heavier than the other, and this may change once the armor plates are installed.

After being worried about the pull strength of the magnet + washer, I drilled in from the top of the shoulder and installed another 3/4″ magnet in the top. Now the pull force is nice and heavy… very little chance the arm will just ‘fall off’ when bumped, and it requires very deliberate pull force to remove.

The downside to a magnet in the upper shoulder (instead of just the washer) is that I had to spend a lot of time notching out the upper shoulder plates so they would fit ‘flat’ over the magnet. This is why I tried the metal washer approach to begin with, but after 30 minutes of filing was able to get the shoulder plates to lay flat, and the magnet is covered up nicely when everything is installed so I’m okay with the looks of the ‘magnet on top’ approach.
I tried popping out the washer…but JBWeld is strong stuff and it wasn’t going to pop out, sut I have an extra 1/8″ of height on the upper shoulder magnet that I wouldn’t need had I just gone with the magnet only in the upper shoulder.
Below, you can see the upper should plate masked off before I painted. The middle support ‘bar’ with the masking tape on it clearly shows the notch I had to put in for the plate to sit flat. I also had to file down a few other locations on the shoulder plate to get it to sit flat, but the notch where the masking tape shows up is the biggest modification required.

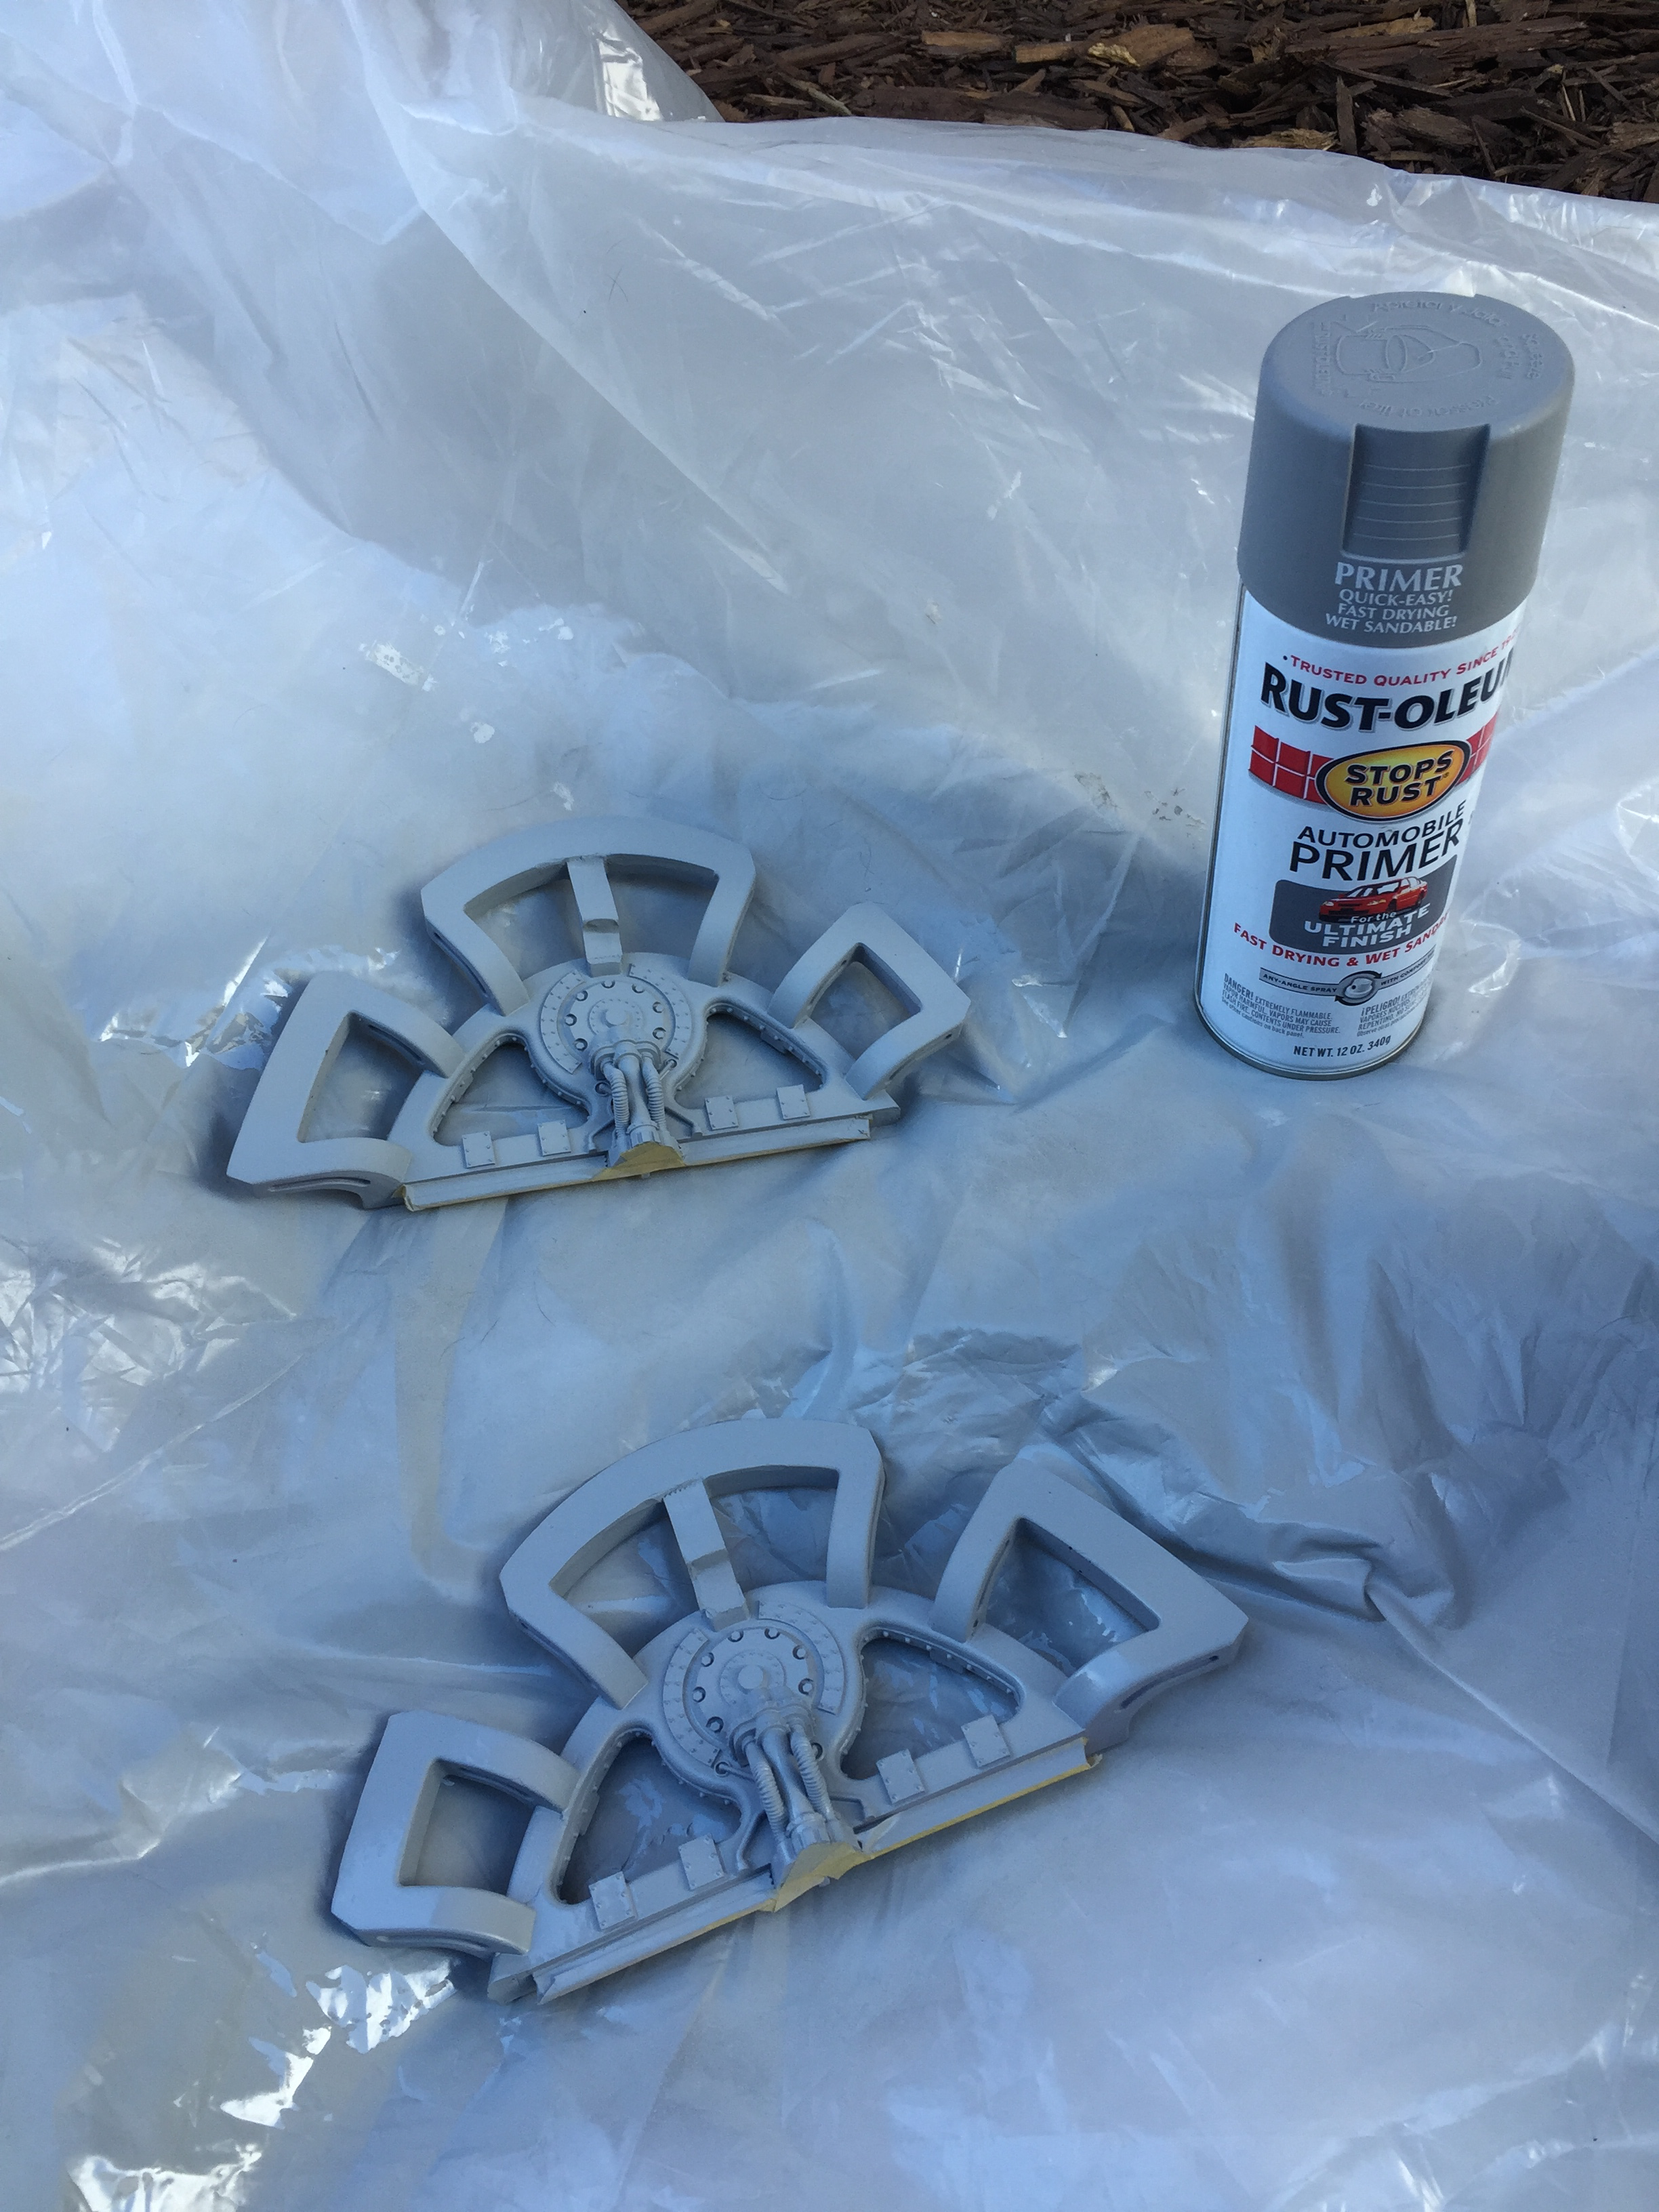
Because it’ll be very difficult to paint between the upper shoulder and the shoulder late, I went ahead and primed/painted both before gluing everything in. I use rust-oleum gray sand-able primer (found at an auto parts store) for the primer, and I tried games workshop new airbrush paint (leadbelcher). I don’t use much Games Workshop paint, but still love their metallics.
I didn’t prime the entire upper torso (yet), just the sides near the shoulder assemblies.

Here is the shoulder, painted up with Games Workshop Leadbelcher Air

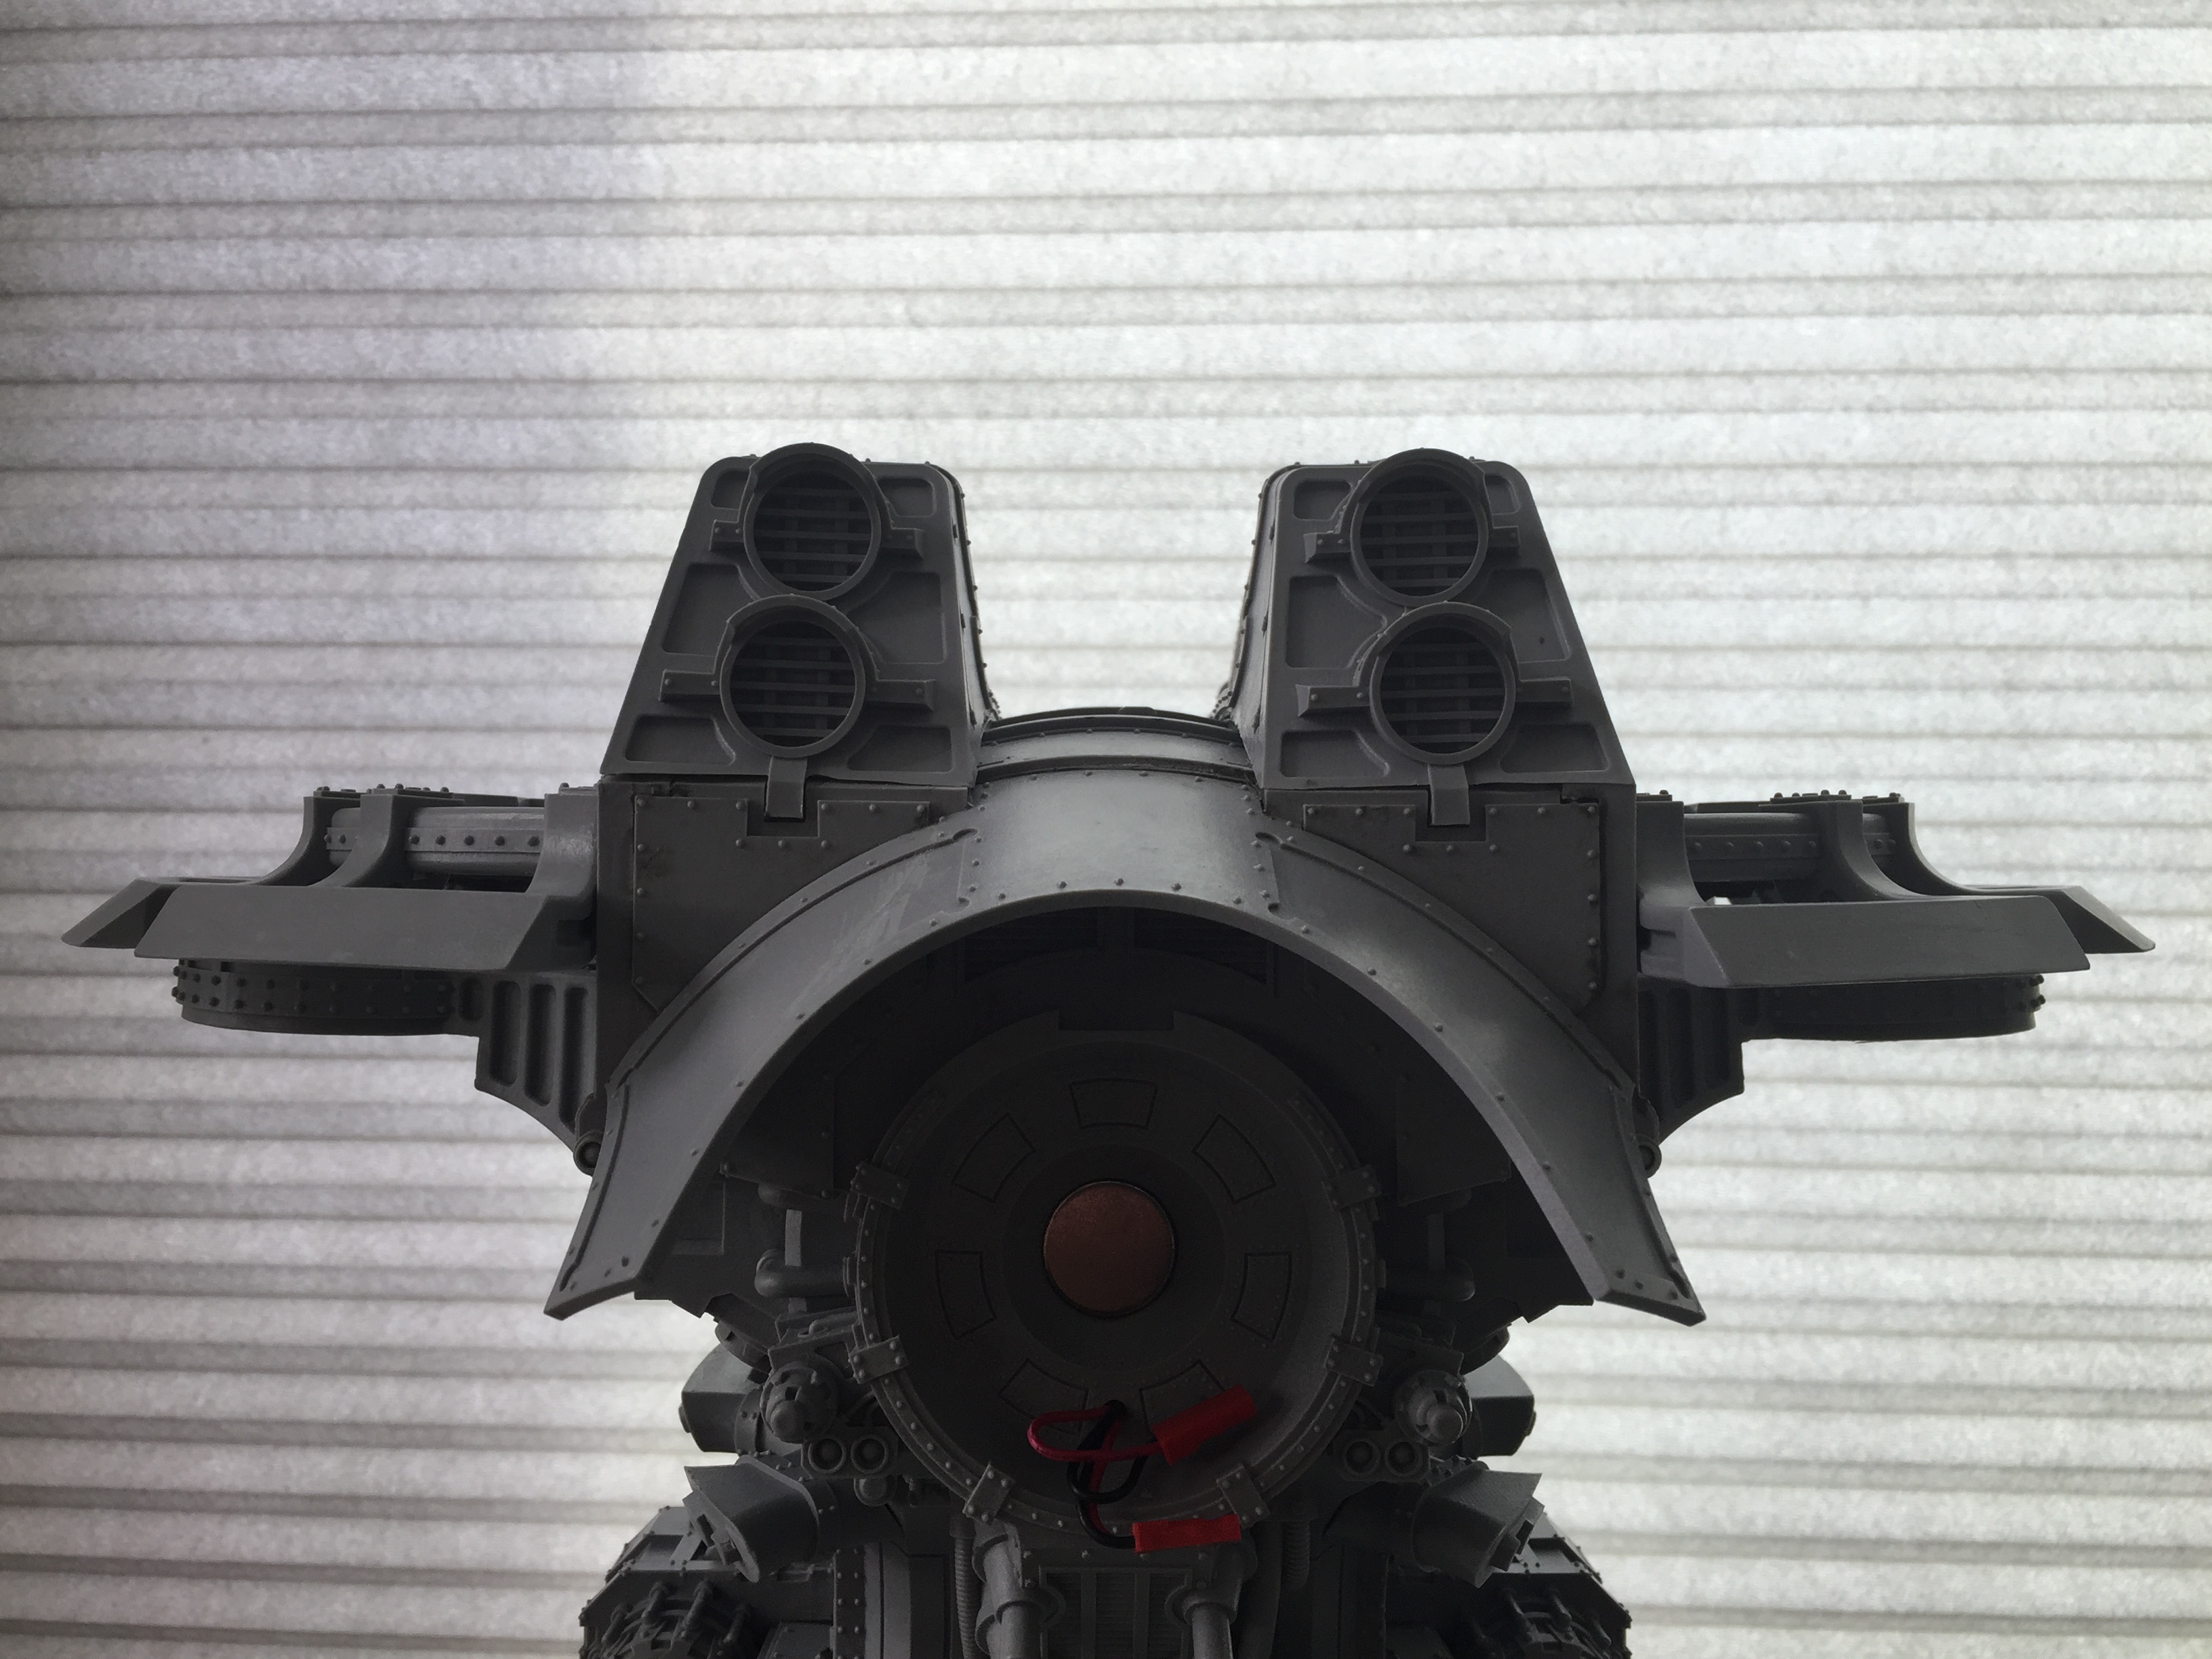
And a picture with the volcano cannon attached (magnetically)

The shoulder plates after lots of notching/filing so they sit ‘flat’ on the shoulders.
Hole drilled ready for the 1/2″ magnets (SD84-IN from K&J with a 9.9 pound pull force magnet to magnet) for the shoulder mount

The shoulder mount with a 1/2″ magnet installed / glued in place.

And that’s the overview of the way I approached the arms/shoulders/magnets/bolts on the warlord titan.

Leave a comment